


|
|
|
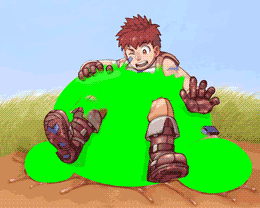
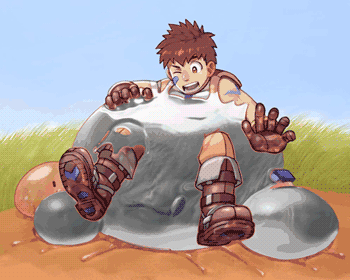
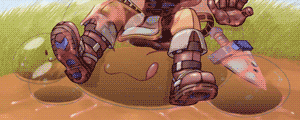
Inspired by my exercise on creating a Jelly creature in 3D, I decided to experiment on how to create that look entirely within the 2D medium, in a way that also facilitates morphing and animation. And then I throw in a guy suspended in there because that sounds fun.
The most important things that I wanted to simulate here is reflection and abberation.
These characters are from the game Ragnarök Online, the slimes are Porings and a Mastering and the guy is a Super Novice.
Software : Photoshop | After Effects

DOCUMENTATION

This step by step process GIF details how to create the slime as a static image in Photoshop. It took about 10 layers to achieve the look.
An expanded, wordy explanation of each steps is available on my DeviantArt.

To facilitate for animation, the scene is divided into layers like so. Notice the masking on each of the slime balls.

The slimes are animated with a combination of scaling and mesh warp. The big slime ball, was mainly animated using mesh warp
like so.

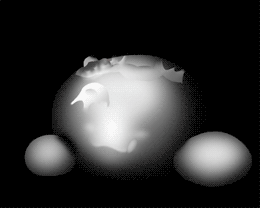
The reflection is created using the After Effects CC Glass. Each slime balls have a manually painted B/W "depth map" version, and because the slime is animated purely with deformation, this depth map deforms with it.
And then it's simply plugged as the Bump Map for the CC Glass Effect to deform whatever image it should reflect
(in this case, a grass field much like the background)
The slime also have a key green color version which I then key out and use as the Alpha invert of the finished reflection image.
This is the finished, keyed out reflection image that I simply put as a Soft Light Layer over the slime.

I had to do the back slime separately because doing them all in a single layer leads to undesired border deformation such as this.

Shading are done by animating the shading of each balls separately then merging them and setting them to Linear Burn (in grey color)
And extra, "Caustics" layer are done by creating an ocean ripple effect with Turbulent Noise and CC Vector Blur, masking them to the blurred version of the Shading layer and offsetting them slightly to the side.
Finally, a smaller shading circle with gradient mask is also animated accordingly, this will be used to mask out the slime color to create that distinctive dark ring under the jelly.
Notice how the slimes on the left have their dark ring "fall off" as it lifts off the ground.

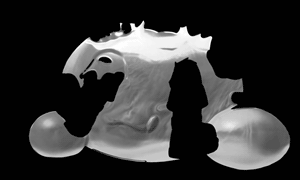
As for Abberation, it is done simply using Fast Blur and Turbulent Displace on an Adjustment layer that is masked using the slime's Alpha. Here we can see the effect of it with the Slime Color turned off, giving the look of a transparent, water-like spheres.


